Written Instructions
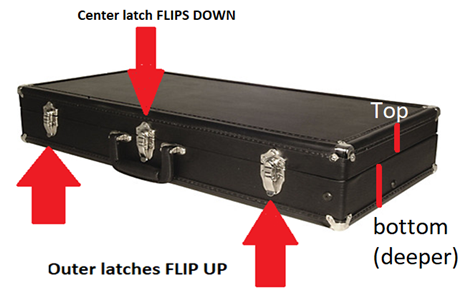
- Put the case on the floor in front of you and make sure the case is right side up.
- The bottom section of the bassoon case is deeper or thicker than the top.
- Make sure the two outer latches flip UP (if they flip down the case is upside down).
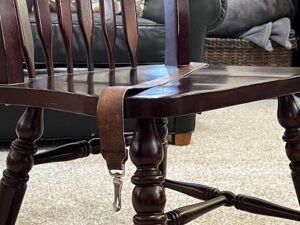
4. Take out the seat strap and place it diagonally across the chair with the hook or cup near the right-side front edge.
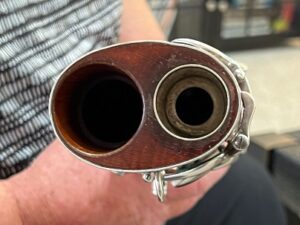
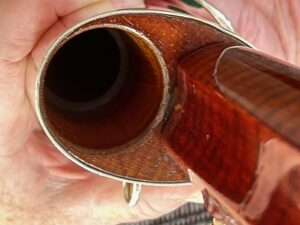
5. With your left hand, pick up the boot joint. There are two holes on the top of the boot joint. Hold the boot so the larger hole is on the left and the smaller hole is on the right. Rest the bottom of the boot joint on the chair between your legs.
6. With your right hand, pick up the wing joint and hold it so the tenon is at the bottom and whisper pad is at the top. The tone holes will face away from your body. The bridge key should be at bottom right of joint and the concave curve is at the lower left.
7. Insert the tenon of the wing joint into the smaller of the two holes at the top of the boot joint.
8. Align wing joint so that the concave edge forms a concentric circle with the hole for the long joint.
9. While supporting the boot with your left hand, lower the boot-wing assembly to the floor.
10. Hold the boot-wing assembly with your right hand and pick up the long joint with your left hand. Hold the long joint with the larger tenon at the top, the thumb keys facing you, and the pinky keys facing away from you on the left.
11. Place the right-side convex curve of the long joint against the concave curve of the wing joint and slide the long joint down into the hole in the boot joint.
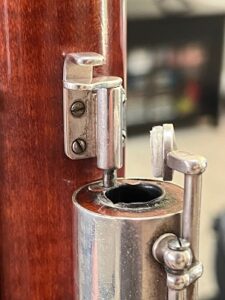
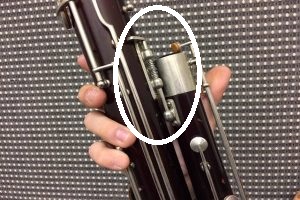
12. Engage the body lock between the wing and long joints. The body lock keeps the two joints in proper alignment with each other.
12. Hold the partially assembled bassoon with your right hand and pick up the bell with your left hand so that the bell ring is at the top.
13. Hold down the low Bb key cup down with your left thumb and slide the bell onto the tenon at the top of the long joint.
14. Hold the long joint of the bassoon with your left hand and pick up the bocal with your right hand.
15. Be mindful of the small protrusion located just above the cork. Ensure that it does not catch on the whisper-key pad when inserting the bocal.
16. Hold the bocal as near the cork as possible and slide it into the receiving hole at the top of the wing joint.
17. Align the bocal so that the hole in the nub can be closed by the whisper-key pad.
18. While holding the boot joint in your right hand and the wing/long joints in your left hand lift the bassoon to rest on your right thigh.
19. Attach the seat strap to the bottom of the boot joint cap and lower the boot joint down until the strap supports the weight of the bassoon.
Things to know
When the bassoon is assembled properly:
- The seat strap hook/cup/ring is on the player’s right side.
- The bocal should point toward the face of the player.
- The tone holes on the wing and boot will face away from the player.
- The thumb keys on the long, wing, and boot will face the player.

Feedback/Errata